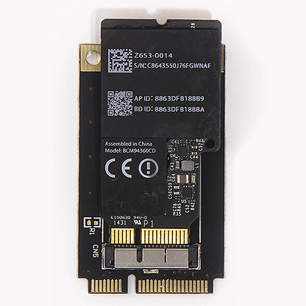
Classic Mac Pro 5,1 (also 4,1 upgraded to 5,1) features only Wi-Fi 802.11n and Bluetooth 2.1. Here’re main reasons why you want to upgrade Wi-Fi to 802.11ac and Bluetooth to 4.0:
- You get Continuity, Handoff and new AirDrop working natively
- Wi-Fi 802.11ac is insanely fast, Bluetooth 4.0 is more reliable, secure and way quicker
- macOS 10.15 Catalina no longer supports old BCM94322MC Wi-Fi card so Wi-Fi will not work there
Disclamer: this website is by no means associated with any of ebay sellers mentioned here. Links are provided for your convenience. We take zero responsibility if you damage your computer somehow (highly unlikely but you never know).
The upgrade kit described here is 100% native, doesn’t include any external cards, antennas and doesn’t require any additional software installation. The Broadcom card mentioned in the kit is used in many iMac models thus natively supported by macOS. Some smart guy sells similar kit for around 215 USD + shipping but normally you get it for less than a quarter of the price (and free shipping from China)
The kit:
- Broadcom BCM94360CD + mPCIe adapter. Ebay
- Bluetooth antenna extension cable. Ebay
- JST GH 1.25MM 4Pin connectors (3). Ebay
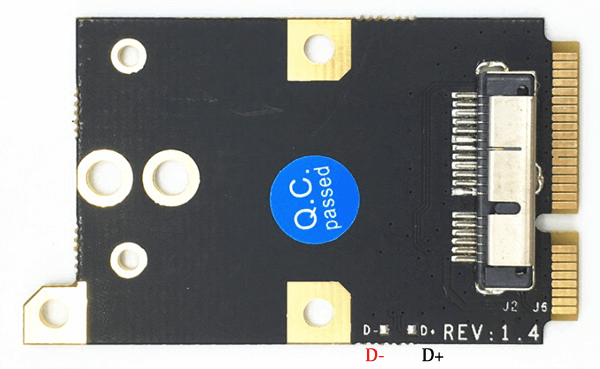
UPDATE September 2019! There’s a version of the mPCIe adapter that doesn’t require soldering! Amazon, Ebay. In this case you can skip Step 1.
1. Solder Bluetooth data cable to the mPCIe adapter
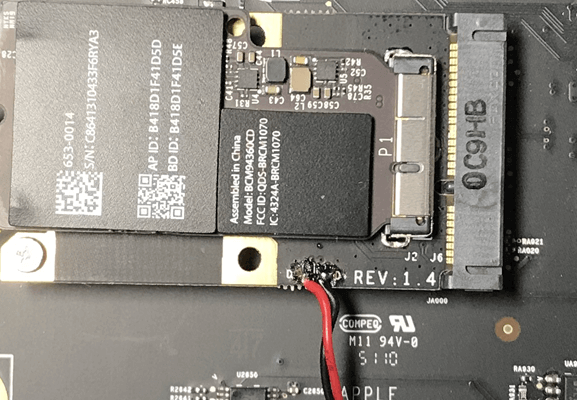
The original Bluetooth card will be removed because the BCM94360CD has both Bluetooth and Wi-Fi on board. D+ and D- connectors on the mPCIe adapter must be connected to the motherboard instead of the old Bluetooth card.
- You will need THREE JST cables where you remove yellow and green wires (only black and red are used).
- Connect them to each other so you have enough length for Bluetooth data cable:
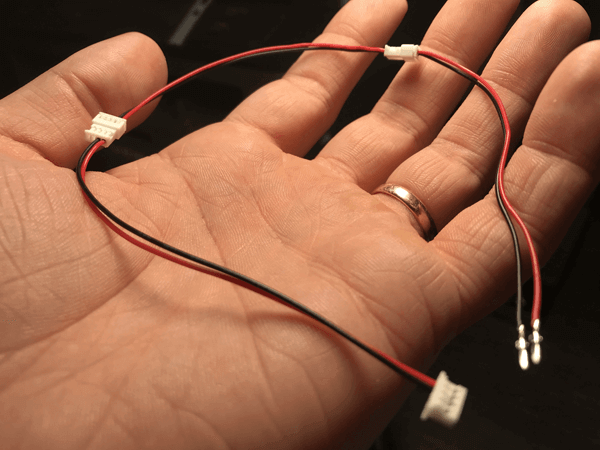
- Solder (or ask someone who has a soldering machine) D+ and D- contacts on the adapter to black and red wires correspondily (not quite neatly on the photo).
2. Remove CPU/RAM tray
Open your Mac Pro and remove the CPU/RAM tray.
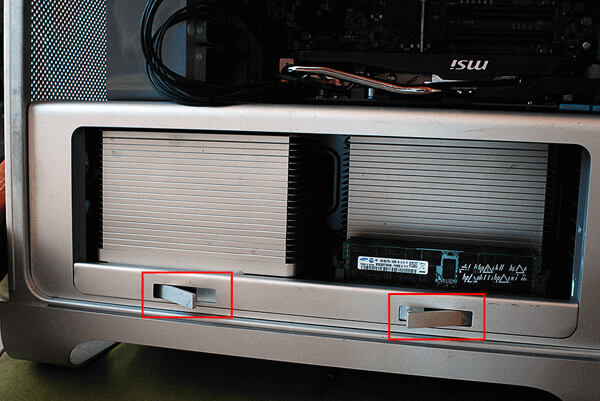
With the tray removed your computer should look as on the photo below. Wi-Fi card is highlighted on the left and the small Bluetooth card on the right. Later we will be passing wires behind the area highlighted in the center.
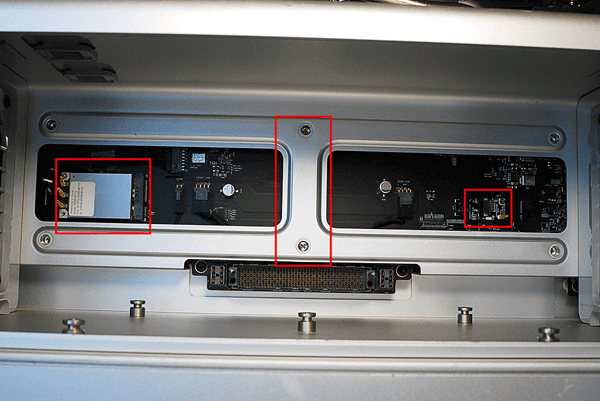
3. Remove old Wi-Fi & Bluetooth cards
- Unscrew two small screws holding the old AirPort Wifi card and disconnect 2 or 3 antennas by lightly pulling them towards you (depending on the model, one antenna can be unused and hidden below the card), remove the card by sliding it to the left.
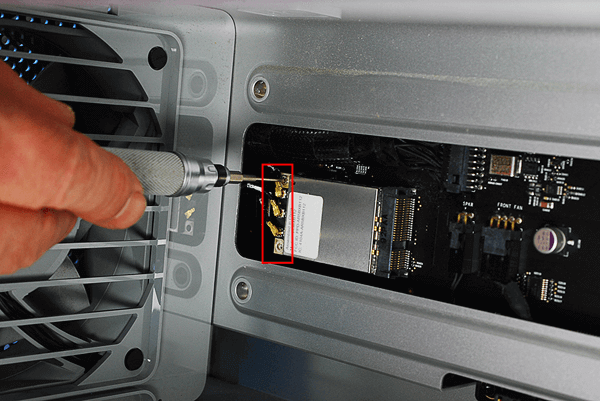
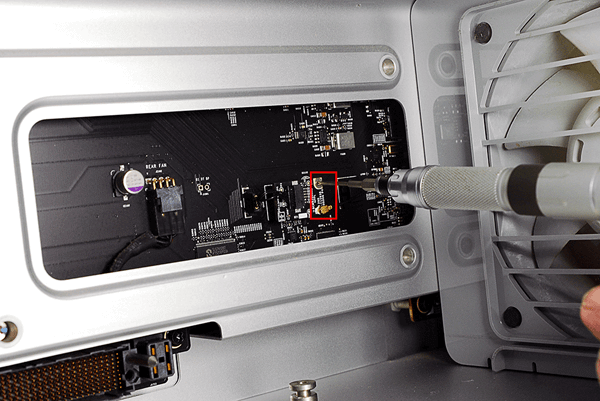
- Unscrew 1 screw holding the old Bluetooth card, disconnect data cable and gold antenna connector, remove the card by pulling it towards you, it’s slightly glued with adhesive.
4. Installing new Wi-Fi & Bluetooth card
The new card with adapter goes in the PCIe slot where your old Wifi card was. Connect three existing Wi-Fi antennas and one Bluetooth antenna extension cable to the card exactly as shown below:
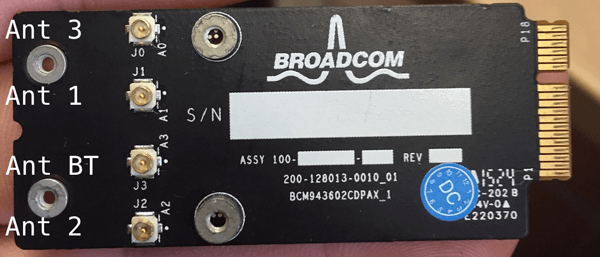
Slide the card with all 4 antennas attached into the mPCIe adapter then slide the adapter into the mPCIe slot. Tighten the adapter in place with one of two screws holding the old card.
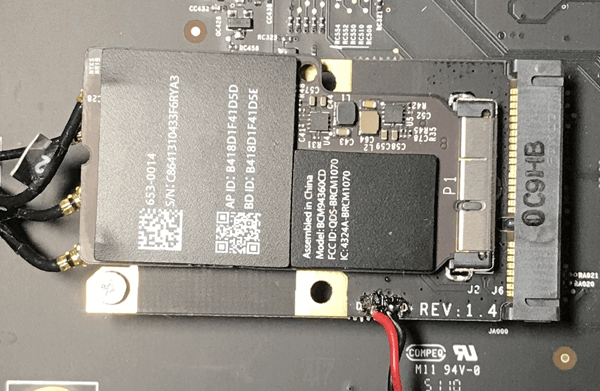
The loose end of our Bluetooth antenna extension cable should be connected to the existing Bluetooth antenna cable (disconnected previously from the old Bluetooth card).
The loose end of our Bluetooth data cable must be connected to the motherboard:
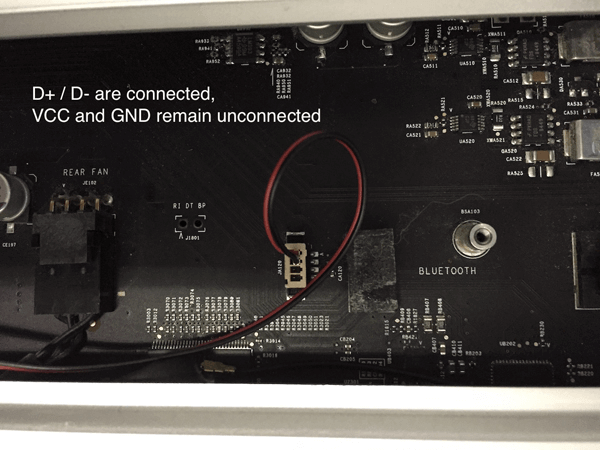
When possible use small pieces of tape to fix wires to ensure they stay securely connected and don’t move much.
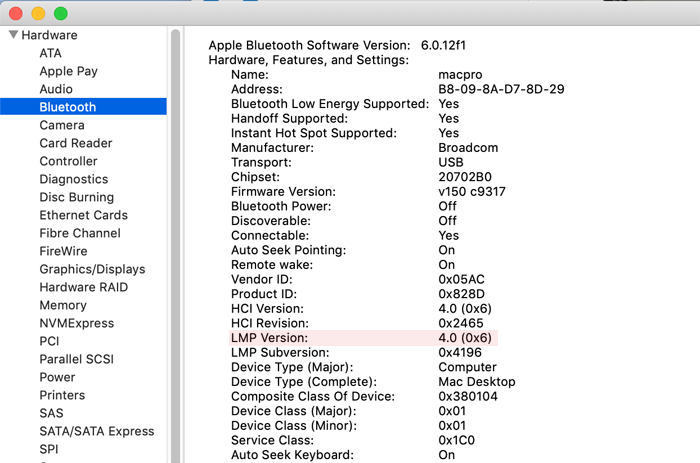
The guide is based on this MacRumors thread.
